
Interminal
Procedural terminal in Interminal
Hi everybody, I'm going to talk about our infinite terminal-generation in Interminal, as some people have requested!
Half of this post is going to be very technical, the other half is not so much. This is a good reason for me to document how we did things. Hopefully this is useful or interesting for others too!
In the game, we are procedurally generating most of the things: the planes, the flights, the gates, the shops, the perfumes, the smells.. and the terminal itself.
I'm going to talk about the latter: the terminal generation. Our terminal consists of 2 main parts:
- The terminal building
- The shopping floors inside the terminal
So let's look into what actual building blocks or pieces Ivan build for our terminal generation.
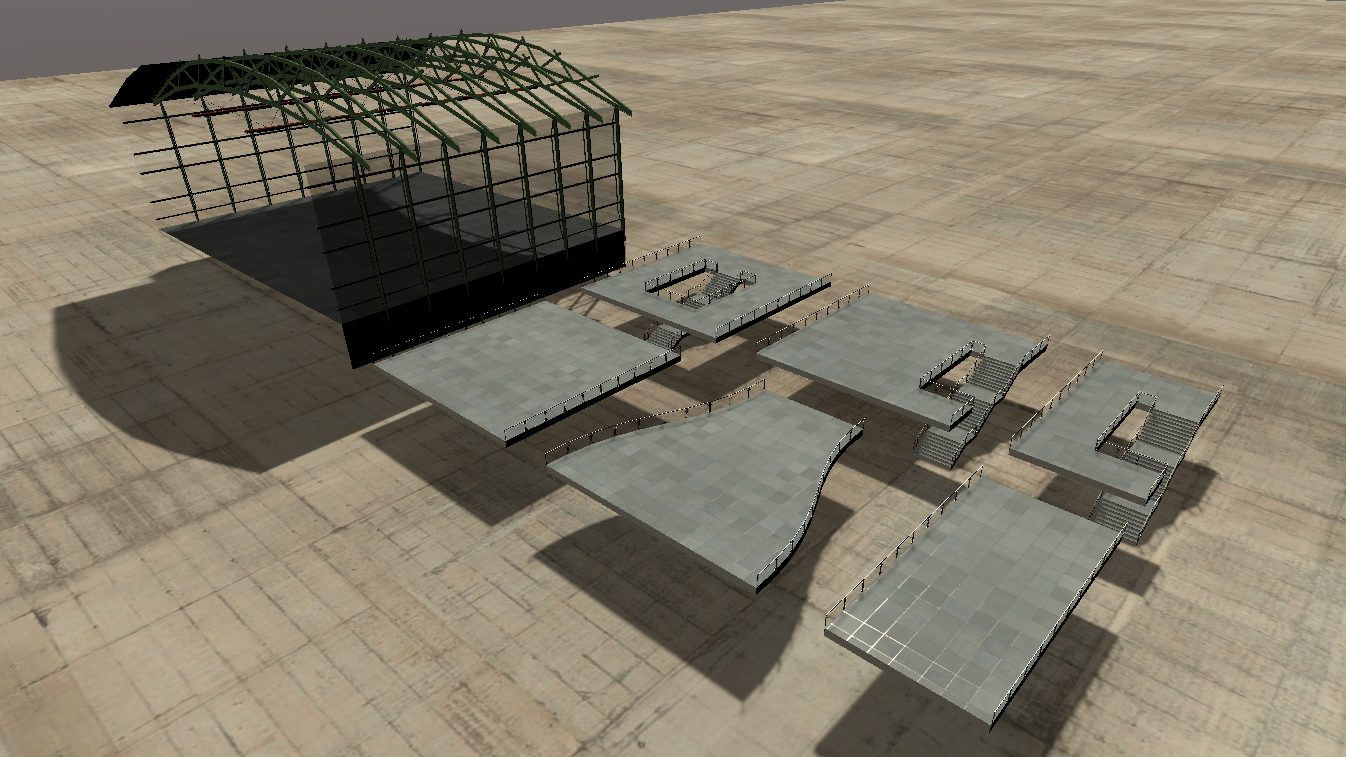
As you can see, we have 1 model for the terminal building, and 6 different models for the shopping floors. All of them have a common characteristic: they are straight.
But in-game the terminal is clearly more interesting than that, and also more curvy. So how do bend these models?
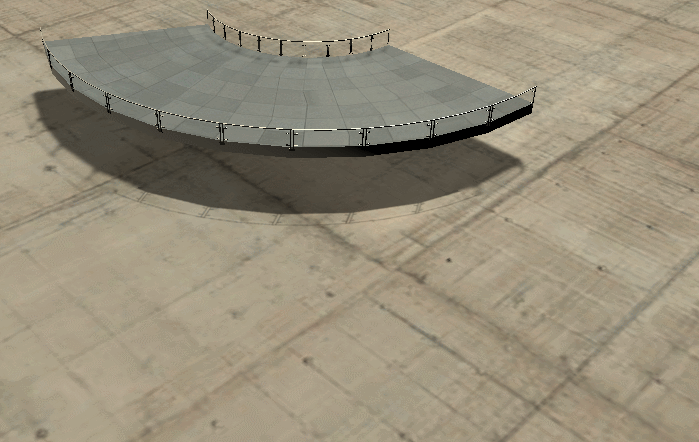
We are not using bones: in our case, we don't need to dynamically bend the pieces since they won't move (although that would be interesting), we just want them to bend at a certain angle so we can create these intertwining floors to shop without getting bored.
What we do instead is to just to bend the models by a certain angle at runtime when we instantiate them, creating a new mesh in the process. For this, we defined a transformation function that transforms a position of a vertex of our mesh, into a rotated position.
Let me try first to describe the transformation, and then to show how we use it.
The boring maths: how do we bend our models
First let's state some specifics about our bending:
- All of our meshes (pieces) stretch in one cardinal direction: they are are straight.
- We know the length of our meshes want to keep it constant (as we'll explain below).
- Our rotation axis is vertical.
- We will only consider rotations between -180 and 180 degrees.
For simplicity, our meshes stretch forward on the Z axis and we rotate on an vertical axis that is parallel to the Y axis in unity.
For our bending, we transform any position into the following coordinate system:
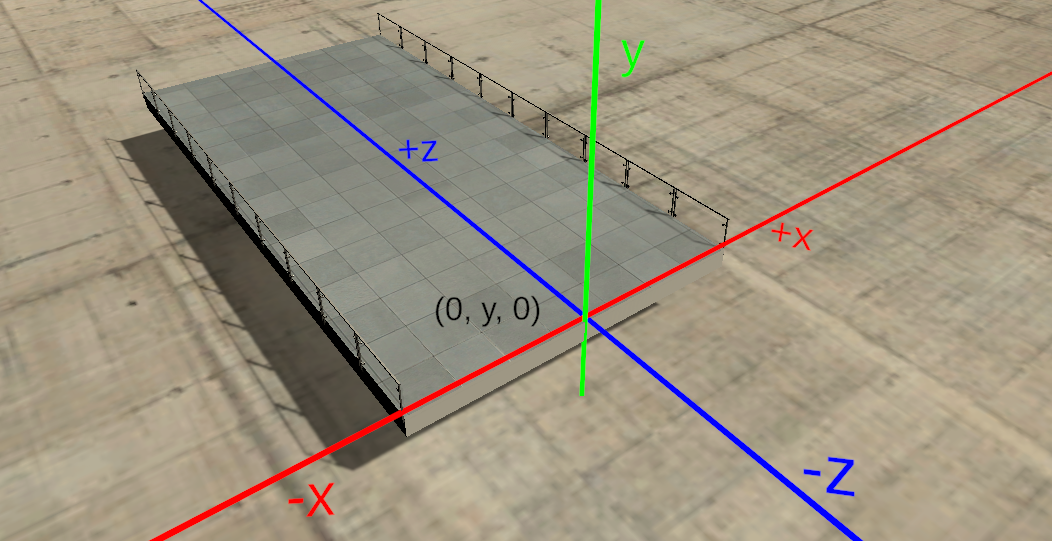
Given any position or vertex of the mesh, transformed into the coordinate system above ( 𝑥, 𝑦, 𝑧 ), the length of the piece 𝓁, and a rotation angle α, we define the bending function as follows:
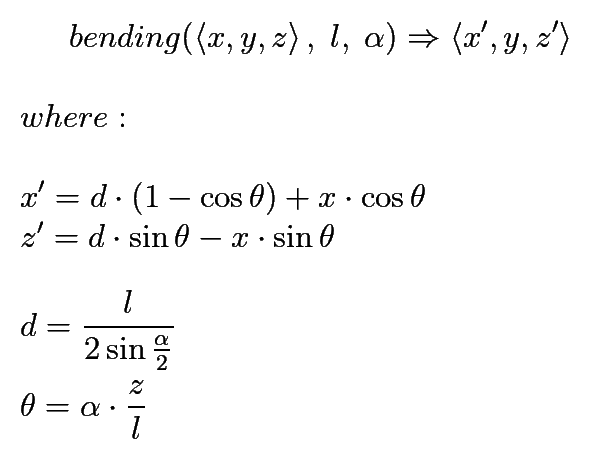
Please note, the function is discontinuous at α = 0, where returned 𝑧' will be 0.
In Unity's C# it would be:
// angle in radians
Vector3 BendLocalSpaceVertex(Vector3 v, float length, float angle)
{
    if (angle == 0f) return v;
    // rotation-pivot distance
    float distance = length * 0.5f / Mathf.Sin(angle * 0.5f);
    // rotation angle (theta) at z
    float angleAtZ = angle * v.z / length;
    v.x = Mathf.LerpUnclamped(distance, v.x, Mathf.Cos(angleAtZ));
    v.z = (distance - v.x) * Mathf.Sin(angleAtZ);
    return v;
}
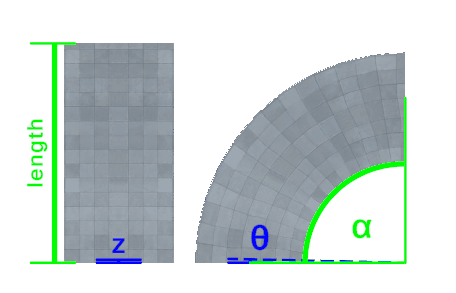
The distance d we calculate, is the distance between the our origin and the conceptual rotational-pivot. This can be obtained with only the length of the piece and the rotation angle. You can see in the following image how the triangle formed between the blue and red lines is an isosceles triangle. This is a characteristic of this bending of ours, since we want to keep the length of the piece 𝓁 constant.
We find the distance by solving the rectangle triangle that appears when we slice this isosceles triangle in half.
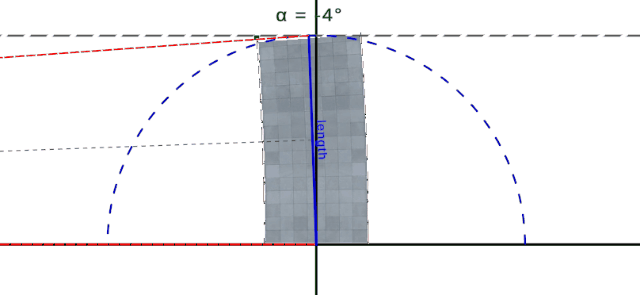
The θ in the formula, is the actual angle that we should rotate the given point. At a depth of 𝑧 = 0, we should not rotate the point, we are at the pivot's 𝑧 (θ = 0). And at a 𝑧 = 𝓁, we should rotate the full amount of the angle (θ = α).
Using this transformation, we transform ALL the vertices of a mesh, and save it into a new mesh that we use even for our mesh colliders in most cases. Also, since we place one bent piece after the other, with this transformation we can know where to put and how to rotate the next piece of the generation.
Ok these maths are sure very interesting, but how do we actually use it in-game?
The interesting bit: how do we bend our models
Terminal building
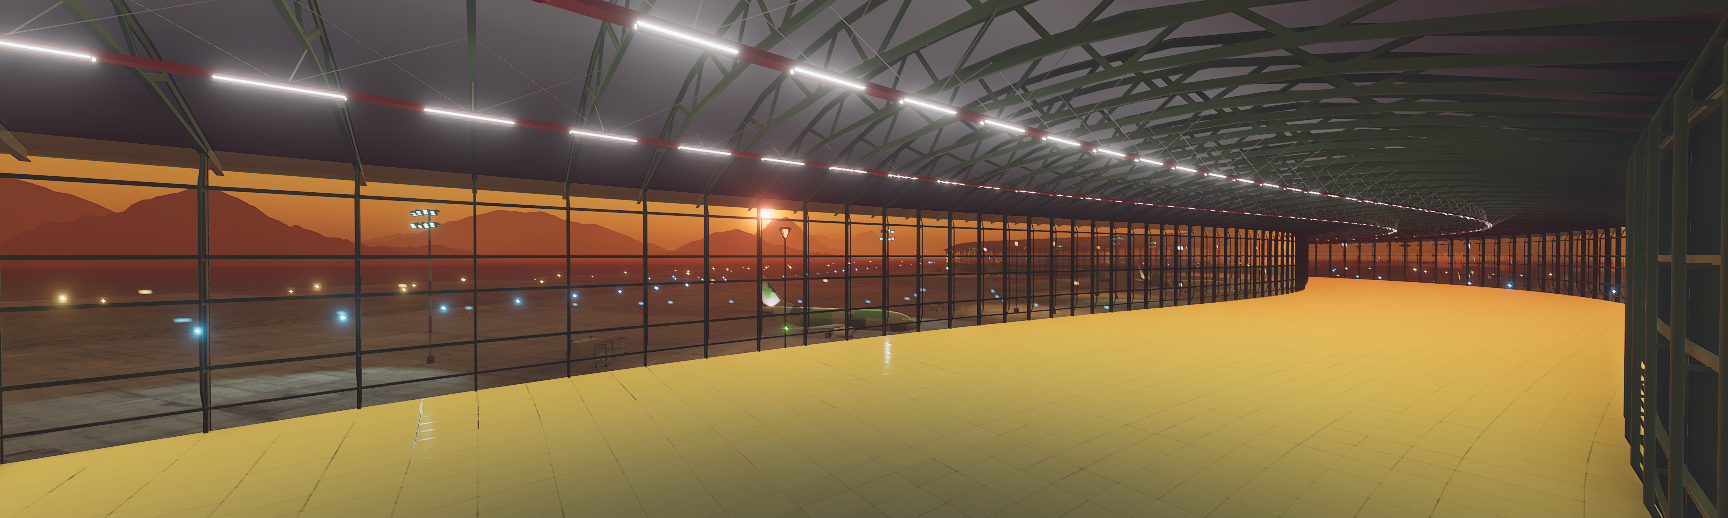
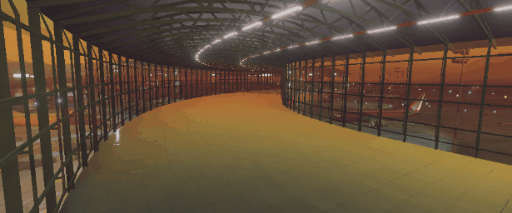
Early on the project, our terminal building was straight, which simplified a lot the generation.. but it had two visual issues we didn't like:
- We can't see outside after a certain distance. Notice how we loose visibility over distance and can't see the glass, and how we can only see the most immediately-close planes.
- We can see the outside horizon from the inside. We see too far inside of the terminal.

We immediately decided to bear with the complexity of a bending terminal. Thankfully for all of us, we went sinusoidal.
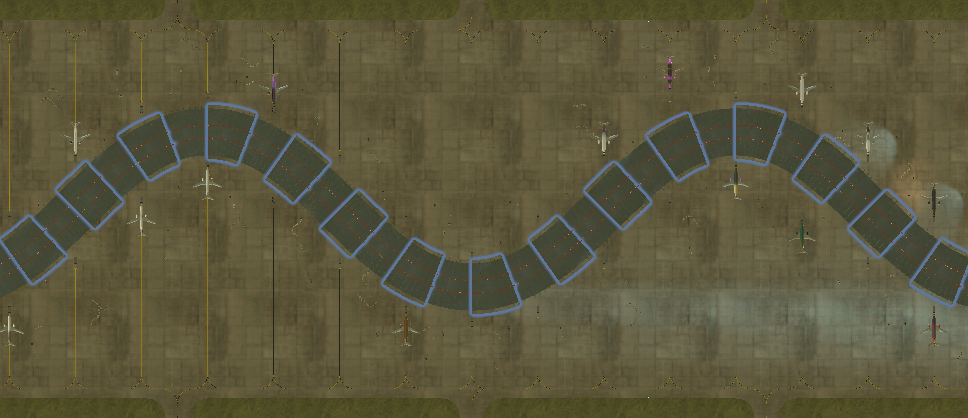
I generate certain amount of terminal pieces per period of the sinusoidal wave. With this shape we gain a lot of visual depth and improves our visibility of the outside so much! Allows us to see the parked planes in the distance, landings and take-offs, and gives us a natural hiding place for our not-yet generated terminal just behind the curve.

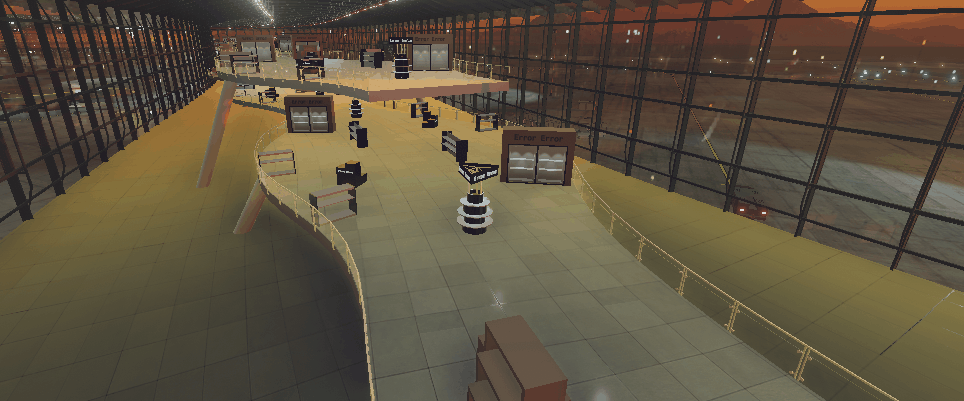
The shopping floors
From the very beginning, we wanted to have at least 2 floors. We wanted to have this verticallity that airport's architecture usually has: unreachable places at first-sight, unless you find your way in the terminal labyrinthine paths.
Also, early we decided to keep the player away from the ground level, that would usually have access to the gates.
After some discussion I decided to try to generate each shopping floor independently, and later try to connect both floors with stairs when possible. This turned out to be a difficult task (as we already knew!)

Very similarly to the terminal, I generate each shopping floor piece by piece. Each time we need to extend the floor, we consider our position and rotation within the terminal space, and figure out the rotation limits that we are allowed to bend the next piece.
We first select a piece to generate and then, also taking into account things such as the length and width of the piece, define the range to randomize the bending angles.
Our calculations are not perfect, but are very happy with the visual result of the intertwining floors.
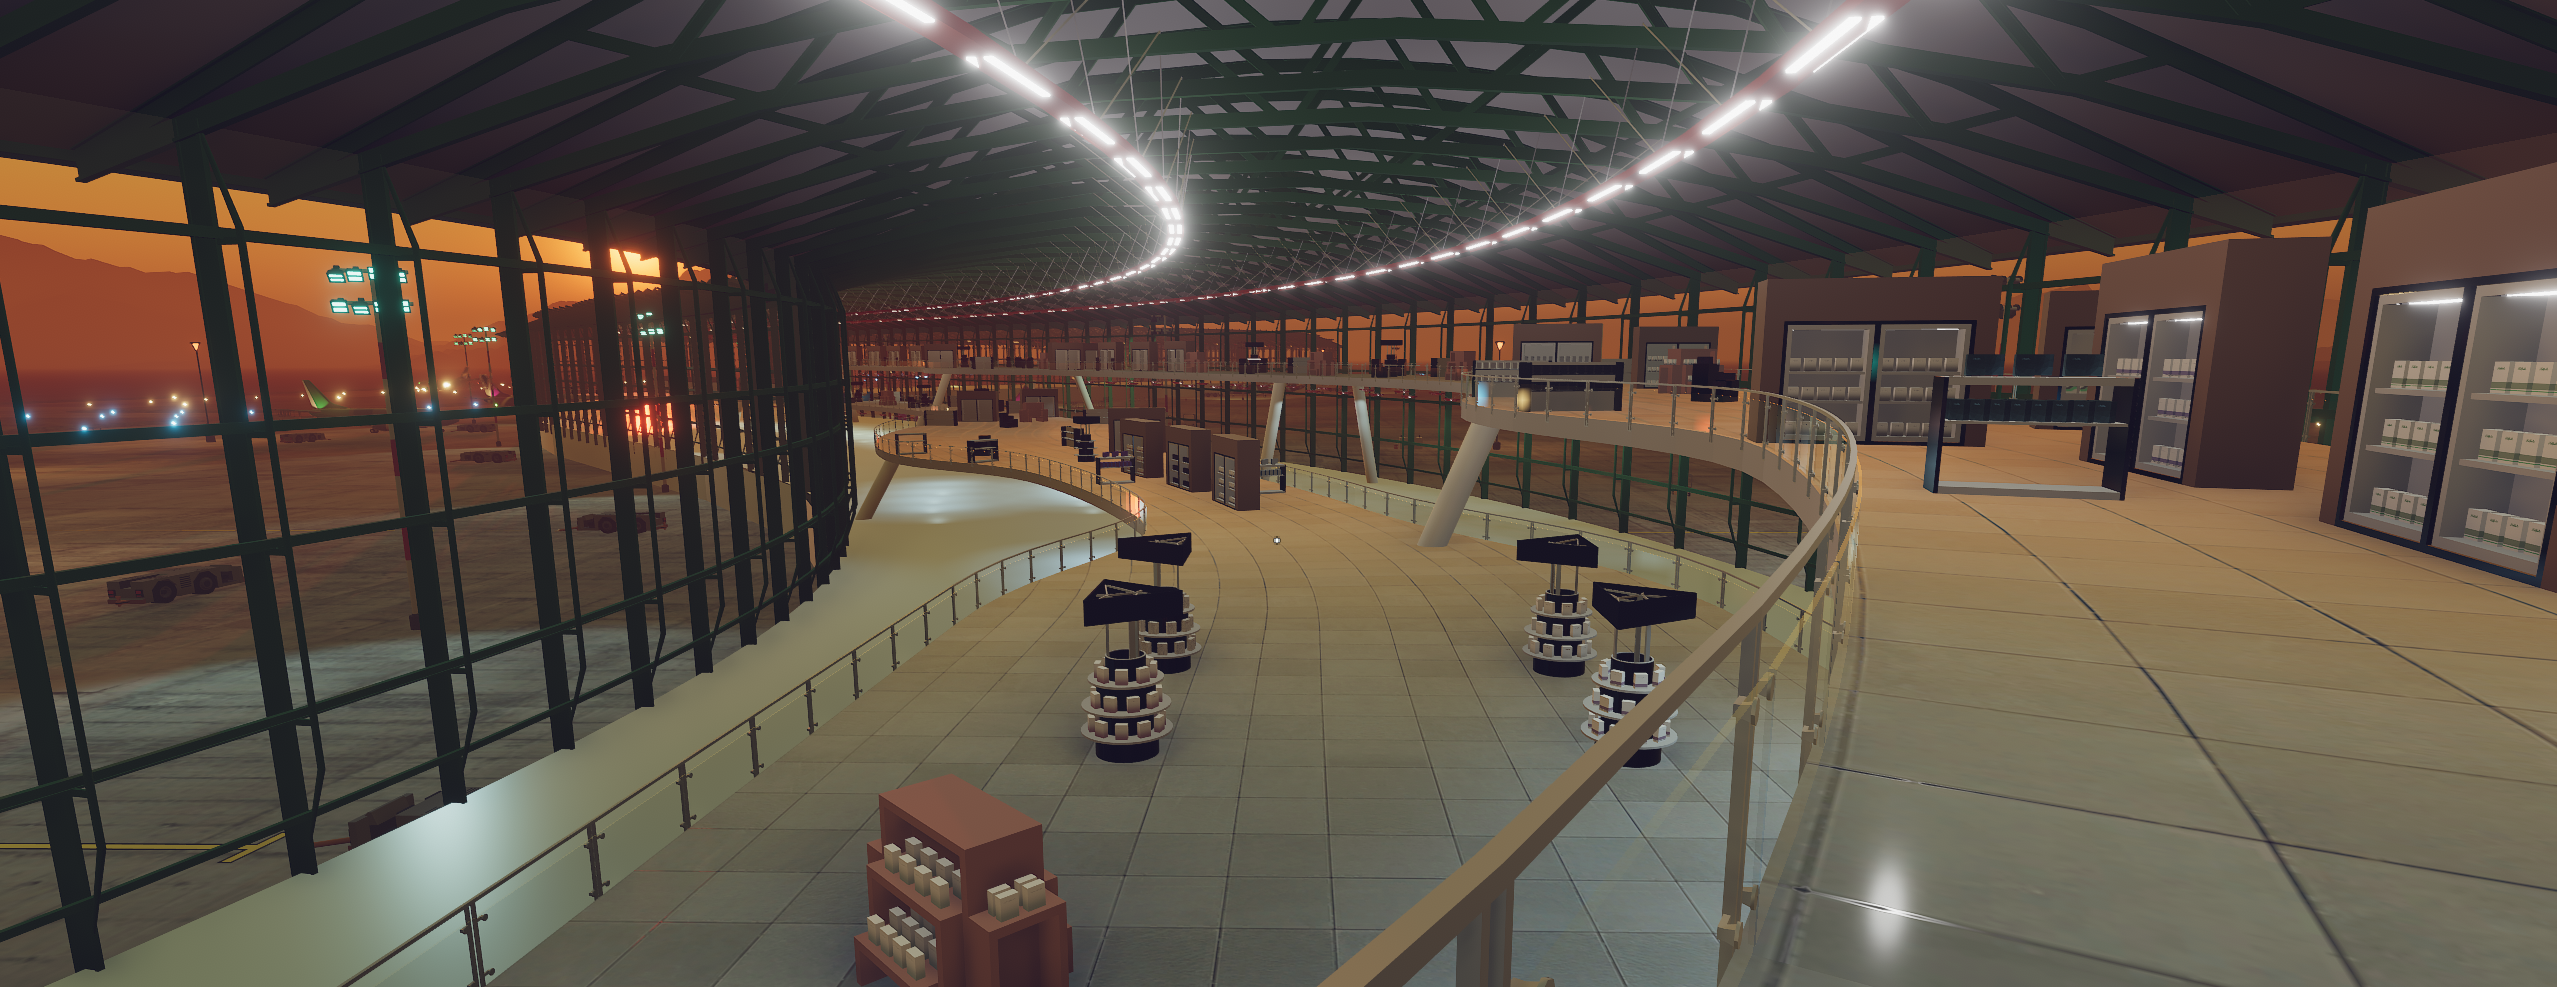
For the stairs, I make sure to generate the bottom floor before generating the top floor. Before choosing a piece of the above floor, I check to see if placing a stair-piece would connect with the bottom floor, and clear the area around the stair landing of any objects like shopping stands.
Since the floors move within the terminal space, and we have quite some available stair pieces, I found that there are many chances for stairs to be placed. Enough for us not to force the connection and just hope for our RNG to help us.
Wrapping up
This has been a rather long post to write up, but that I enjoyed making, along with the gifs, I hope you might have found some of it interesting.
We have only talked about the terminal generation(!), we haven't talked about all the other procedurally generated game elements:
- Shopping stand placement
- Perfumes: name, visual identity and smell
- Airplane livery
- Flights & flight scheduling
If you'd like to know more about those elements, let us know!
I hope somebody enjoyed the maths!
- Ferran
Comments
Log in with itch.io to leave a comment.
God damn. This is some awesome stuff for a free game! I love procedural generation, you guys rock.